Map Creation Guide
This section guides the user through creating a map that covers the fundamentals of road building. While some processes may vary based on specific map requirements, this section aims to cover all essential aspects.
Please note that explanations for RepliMap components are not included in this section, as they are available in the corresponding RepliMap Components section.
To facilitate the use of this guide, it will include a mock process that replicates the development process, accompanied by the guide's narration.
⚠️ Important Notice : Progression Uniformity ⚠️
Do not divide your designated development section and attempt to complete it using a bottom-up approach individually. If changes are required later due to properties or due diligence in other parts of the section, you may need to redo the entire progress, which is against development practices and will delay your work.
Instead, follow the bottom-up approach uniformly throughout the entire designated XODR section.
No skipping!
Layout Planning
In this section, you will plan the development of the map without delving into practical details yet. Identify the zones and project boundaries you need to cover to achieve the best possible outcome, while staying within the project's vision and scope to avoid wasting time.
If you need assistance understanding which parts of the project you are required to complete, consult your team leader. This will ensure that you do not overlap with your colleagues' work areas, avoiding duplication of effort.
Once your section(s) is/are confirmed, use reference sources to gather information about the corresponding area. Use Google Maps to obtain fundamental measurements, as it offers:
- 3D View
- Street View
- Measure Distance
Creating The Basics
❕ Tip : Do Versioning ❕
To ensure you can revert any mistakes, it is recommended and considered best practice to save your progress in stages throughout the current development. This allows you to revert to a particular "safe" stage if needed.
Placing Roads (Primary Roads)
Once you have met the necessary requirements for the fundamentals, you can begin implementing them within the XODR file. In this process, you will start by laying down basic roads, adhering to a bottom-up approach.
At this stage, focus solely on creating roads without adding any additional elements, including connection roads (will be covered later through the steps). Road markings should be added to each of the placed primary roads. This will help prevent overlooking specific road characteristics later while developing other roads.
This will help you have a solid foundation for future steps of the development process.
What to include in this section?
- Primary Roads
- Road Markings
- Road Width
- Road Type
- Material
- Lanes
- Lane Priority
1. Placing Foundational Primary Roads
(First-Level) Foundational Primary Roads: main roads that form the core composition of the current section. Priority is First-Level.
These roads form part as majority of the vital work required for rendering (and analysis).

2. Placing Secondary-Level Primary Roads
Second-Level Primary Roads: main roads that form the core composition of the current section. Priority is Second-Level, however still required.
Example:
- Pedestrian crossings
- Dedicated Primary Roads (detached from other roads workflow)
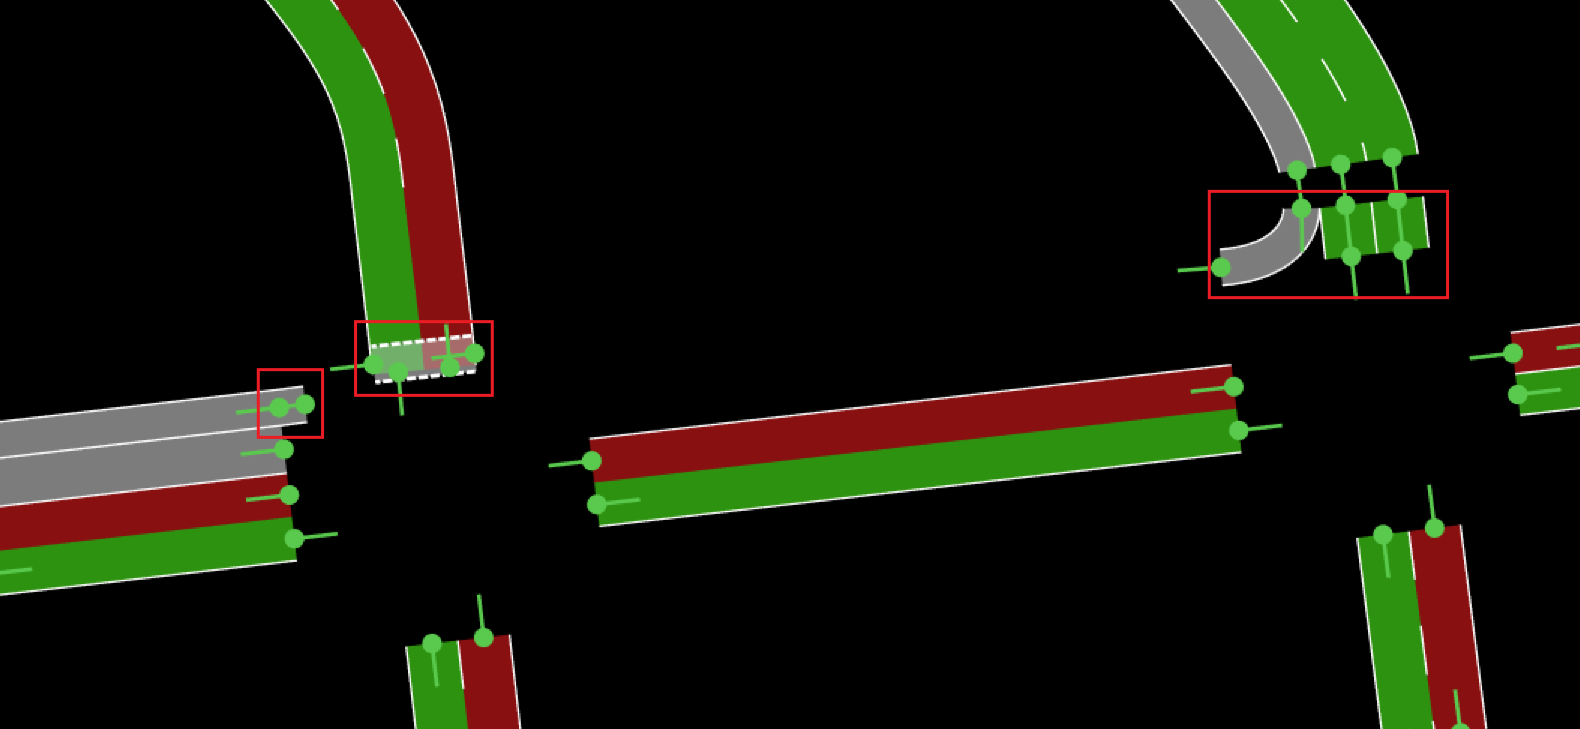
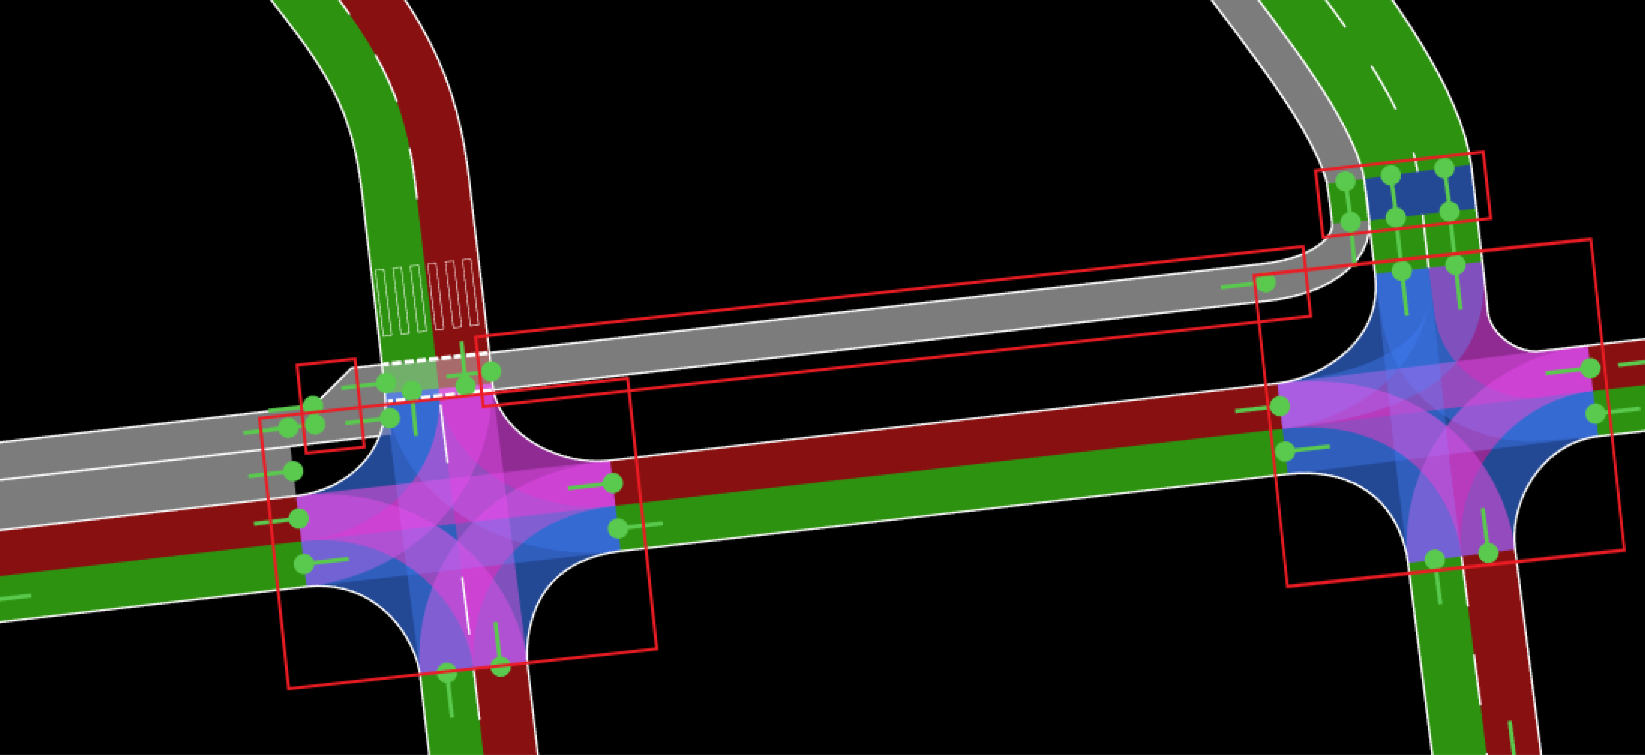
Making Road Connections (Connecting Roads)
Once you have placed the fundamental roads (primary roads) with their corresponding measurements, you can start adding connection roads that logically link the roads to one another.
What to include in this section?
- Connection Roads
- Connection Road Markings
- Connection Road Width
- Connection Road Lanes
⚠️ Important Notice : Logical Considerations ⚠️
Connection roads are based on logical connections rather than just their appearance. This means that connection roads are designed to allow for the possible directions actors can take throughout their journey within the section you are currently developing.
Additionally, when creating connection roads, ensure you also include their corresponding visual characteristics, such as road markings, lanes, and appropriate widths.
⚠️ Important Notice : Pedestrian Sidewalks ⚠️
As previously stated, logical connections are designed to allow for the possible directions that actors can take throughout their journey within a specific section. In the case of pedestrians, these logical connections must also be included.
You must connect the first-level (foundational) primary roads sidewalks to the corresponding secondary-level primary roads (could be pedestrian crossing areas, among others), which should have already been placed in the previous stage.
Adding The Complementations
🎇 Congratulations, you are about 70% done with the XODR file if you have reached this point! 🎇
Now, it is time to start placing more complex objects within the map. This section will include elements that enhance the map beyond the necessary vehicular and actor logical requirements.
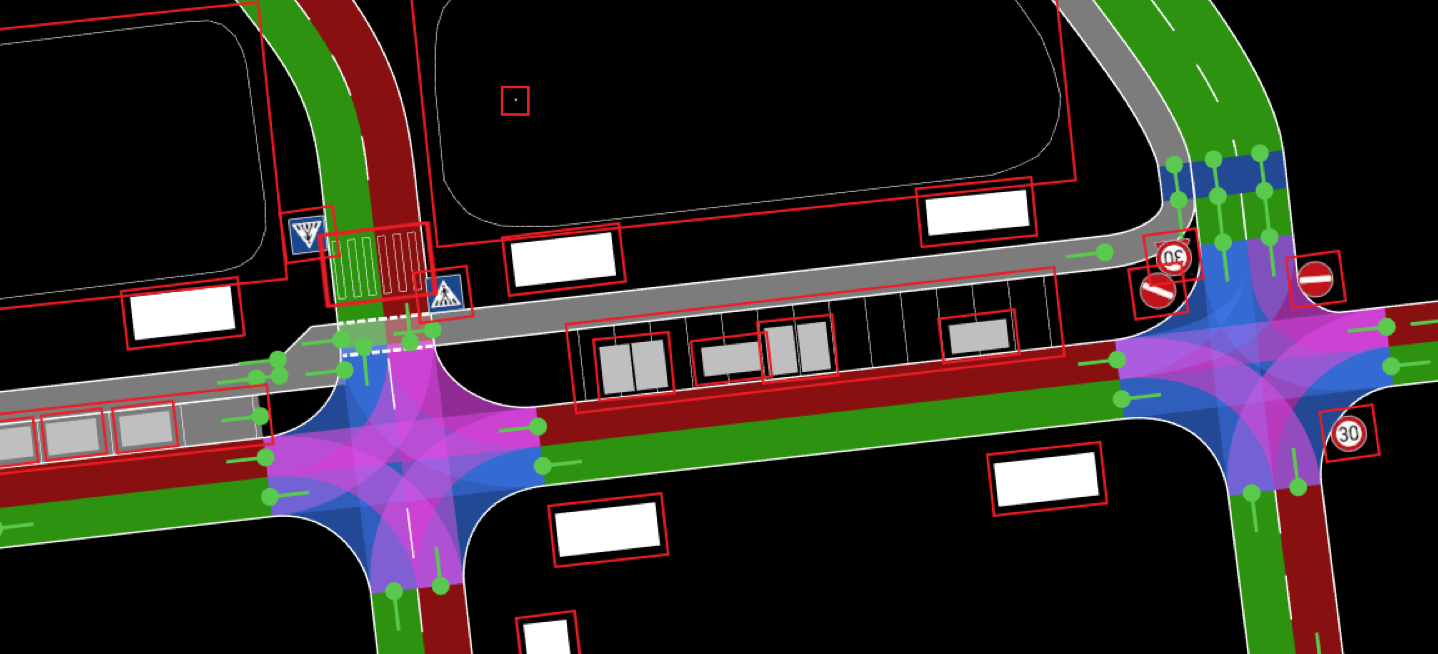
Placing Objects
When placing objects, there is a general approach that is regularly followed. However, this can be done in two ways:
Approach #1
- Placing Houses/Physical Objects: These are physical objects.
- Placing Logical Objects: These are objects that require logical configuration, such as traffic lights, among others.
- Among others: This approach is most effective when the visual layout of the environment is created first, followed by the configuration of logic.
Approach #2
- Placing Logical Objects: These are objects that require logical configuration, such as traffic lights, among others.
- Placing Houses/Physical Objects: These are physical objects.
- Among others: This approach is better suited when your primary focus is on establishing the logic and controls before constructing the surrounding environment.
Placing Polygon Objects
These are flat surface shapes placed on the ground to represent areas such as green spaces, parking lots, sidewalks, or ground markings. They contribute to both the visual realism and the functional accuracy of the environment.
Revision Process
This section focuses on revising the current "finalized" version of the XODR file.
Once you have completed the previous steps, return to Creating The Basics with a revision mindset. You will now review the structure of the XODR file from bottom to top to ensure it is correct and accurate according to the references gathered.
Should you require assistance with this process, please do not hesitate to seek help from your assigned team members or team leader.
Work Delivery
Once you have ensured that your XODR file meets quality standards "as close as it can be", you can proceed to submit your work to your team lead.
How do I send my team lead my work?
Export the most up-to-date, revised version of your file and send the XODR file to your team lead through your designated communication channel. They will know what to do from there.
The responsibility for quality assurance will then be delegated back to them for examination.